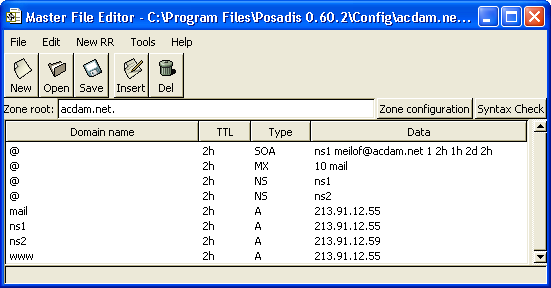
The SOA record contains general zone information. If you want more information, double-click on the SOA record, and leave your mouse on one of the text fields to get the scoop on that parameter (for the moment you can leave them use as-is).
The third parameter is the zone serial number. Changing it is a sign to secondary DNS servers that something has changed and that they should re-load the zone. As of Posadis 0.60.3, the Master File Editor automatically increases this number when you save your master file.
NS records, attached to the zone root, list the DNS servers for the zone by their domain names. Each domain name in your zone you use here should also have A records. If you use a third-party secondary DNS service, you'll also want to add their DNS server domain names (for example “dns.secondary.com.”) here as well.
A MX record attached to a domain name points to mail exchange servers for the domain, that is, the server that receives mail for the domain. So if we want to receive mail for “
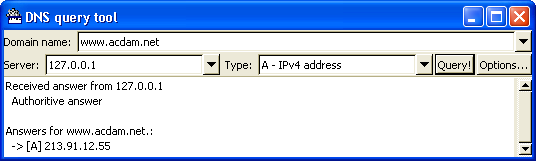
A records determine addresses for domain names. You will need A records for domain names you referred to in SOA, MX and NS records (press the “Syntax check” button to see which domains you have forgotten), and you will also want to add them for other domains you intend to use, for example the “www” and “ftp” subdomains and so on.
If you want to define IPv6 addresses for your hosts, you use the AAAA record type rather than, or in addition to, A records.